


You are using an Excel add-in that keeps disappearing? Also our add-ins, for example Professor Excel Tools, sometimes might disappear after restarting Excel. This article introduces four methods of how to prevent Excel (and other Microsoft Office) add-ins from disappearing.
In a hurry?
- If you’ve downloaded an add-in file (.xlam) from the internet? Check out method 2 and 3.
- Your own programmed add-in disappeared? Go to method 4.
Introduction
Before we start: This article deals with disappearing Excel add-ins. Not so-called COM add-ins. Excel add-ins are basically workbooks, saved as .xlam files.
Although our Excel add-ins (Professor Excel Tools, Break Link Tool, Currency Converter as well as the Password Manager) are coming as an .exe setup file, the core file is also an .xlam Excel add-in. So the following methods apply for the add-ins that you’ve downloaded from this website.
One more thing before we start: Please make sure that the add-in file hasn’t been moved, renamed or deleted? Unfortunately, in such case you’d not necessarily receive an error message when opening Excel.
Method 1: Don’t open add-in by double-clicking on
Yes, it’s possible to just open Excel add-ins by just double-clicking on the .xlam-file. The disadvantage is that if you open an add-in that way, it will disappear every time you open Excel.
But there is a solution: Activate the add-in from within Excel by following these steps:

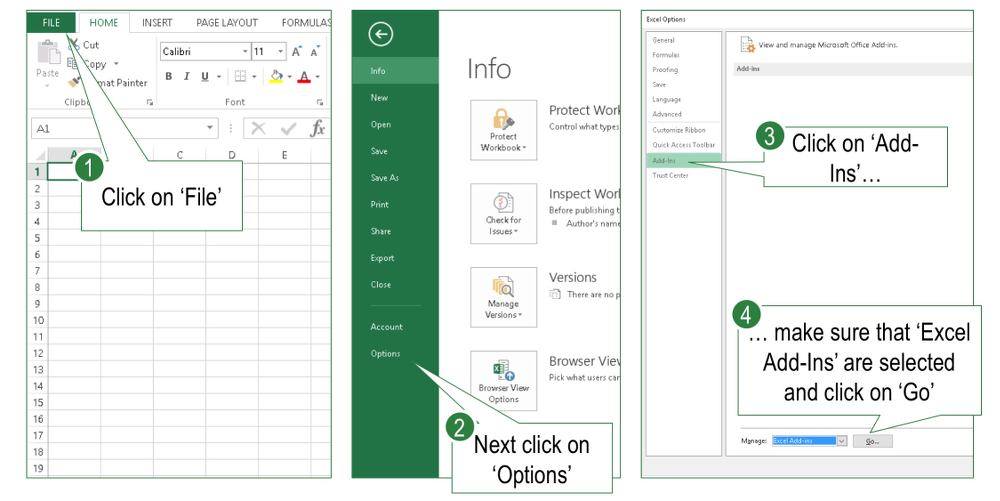
- Click on “Options” on the left-hand side.
- Navigate to “Add-ins” on the left-hand side.
- In the drop-down field on the bottom of the window, make sure that “Excel add-ins” are selected. Click on “OK”.
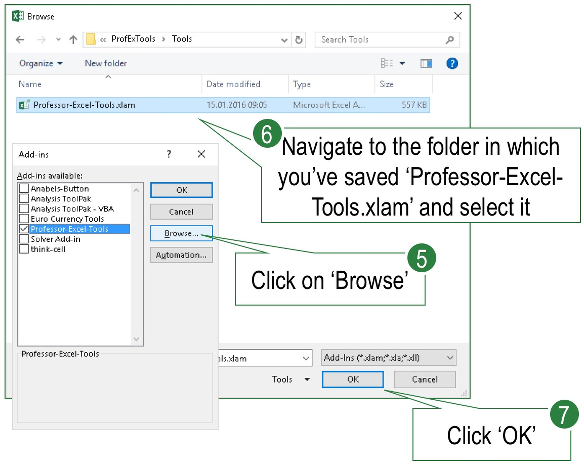
- Click on “Browse…”
- Search the add-in file on your hard drive (e.g. “Professor-Excel-Tools.xlam”) and select it.
- Click on “OK”.

That’s it. If the add-in doesn’t disappear any longer after restarting Excel, you can stop here. But if it’s still gone, please proceed with either method 2 or method 3 below.
Method 2: Prevent add-in to disappear by “unblocking” the add-in file


This method is comparatively simple but it has one disadvantage: In case of updates to your add-in you have to apply the steps again.-
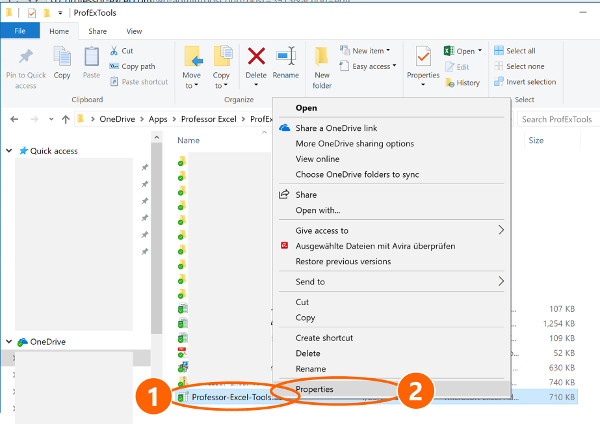
- Locate the add-in file in the Windows Explorer and right-click on it.
- Click on “Properties”.
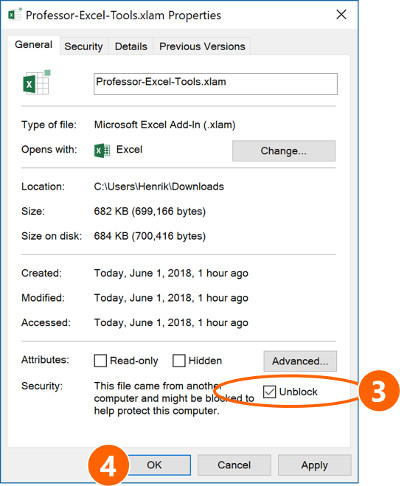
- On the bottom of the “Properties” window, check “Unblock”.
Please note: This method only works after you’ve activated the add-in from within Microsoft Excel according to the method 1 above. It won’t work, if you’ve just double-clicked on the add-in file in order to open it.
Method 3: Define a “Trusted Folder”

The third method requires some more steps but is – compared to our second method above – the better way. The reason is that when you update your add-in or add another add-in you don’t have to repeat the steps again.
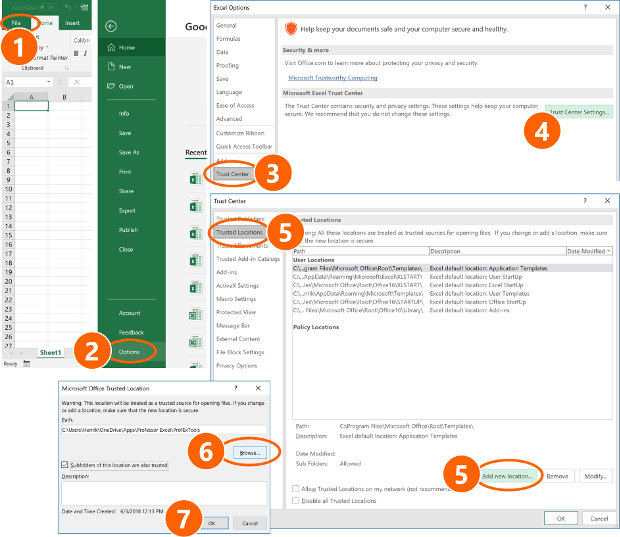
- In Excel, click on “File”.
- On the left-hand side, click on “Options”.
- The “Options” window opens. On the left-hand side, go to “Trust Center”.
- On the “Trust Center” page, click on “Trust Center Settings”.
- Again, a new window opens (“Trust Center”). Click on “Add new location”.
- Now, click on Browse in order to select the folder containing your add-in.
- In total you have to confirm 3 times by clicking on OK.
Do you want to boost your productivity in Excel?
Get the Professor Excel ribbon!


Add more than 120 great features to Excel!
Method 4: Your own add-in? Debug it.

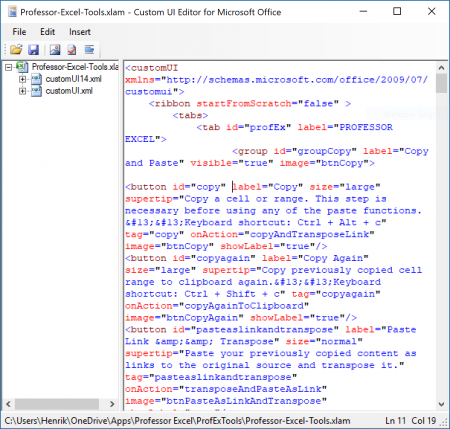
You have programmed the add-in yourself? It’s possible that the ribbon part has bugs – for example a picture for a button is missing. So I’d recommend to carefully debug your XML file, making sure that the XML part doesn’t have any errors.
I use the free software Custom UI Editor to create a ribbon. It also provides a rudimentary “validate” function. Please check for the following things:
- Are all images named correctly according to your code?
- Does each tag and button id only exist once?
- Any missing opening or closing brackets?
Sorry for not being more specific here but this is a very individual process.