


Formatting an Excel table for printing it out is usually troublesome. You have to adapt the print area, select rows and columns to repeat and set the headers and footers. The problem: In most cases, you can’t apply the print layout to several sheets at the same time as it easily overrides your previous formatting. In this Excel Tip, we’ll have a look at setting headers and footers.
Initial comments
Before we start, I have two initial comments:
- If you already know how to set headers and footers but the fields are greyed-out, please refer to this article. It is part of our “Excel FAQ”.
- Please also take a look at our comprehensive guide for printing Excel sheets.
Method 1: Change the headers and footers manually

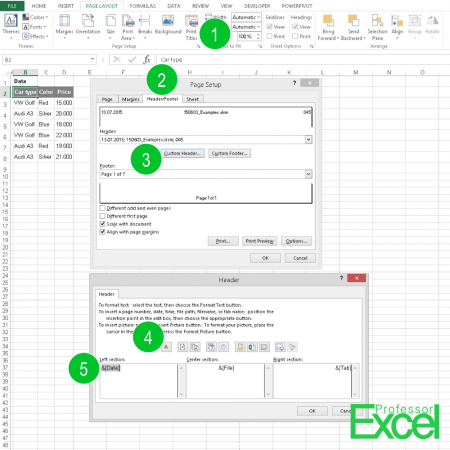
The conventional method is setting the headers and footers manually. Therefore, follow these steps (the numbers are corresponding with the image on the right hand side):
- In the Page Layout ribbon, click on the tiny grey arrow at the bottom right corner of the Page Setup group.
- Go to the “Header/Footer” tab.
- Click on “Custom Header…”.
- Excel provides the important functions as buttons: Page numbers, total number of pages, date and time, file path, workbook name and worksheet name.
- If you want to show the date on the left section, click into the text field and then click on the date button above.
Instead of preparing each sheet separately, you can mark all worksheets and format them at once. Unfortunately, there are two major disadvantages with this method:
- Existing formatting – as page orientation or margins – will be overwritten if you try to apply the new settings to several sheets simultaneously. Especially if you’ve already formatted all other worksheets and only want to update the headers and footers you have to go through all sheets manually.
- Excel doesn’t save your last header and footer settings. In many cases, you already have your own template like date in one corner, file name in another and so on. Every time you have to repeat the steps if you format a new worksheet.
Method 2: Use Professor Excel Tools for perfect print pages
For solving the disadvantages of the first method, the Excel add-in ‘Professor Excel Tools’ comes with a function for setting and updating comfortably. You can update or set printout headers and footers for all worksheets (or just selected worksheets) at the same time.

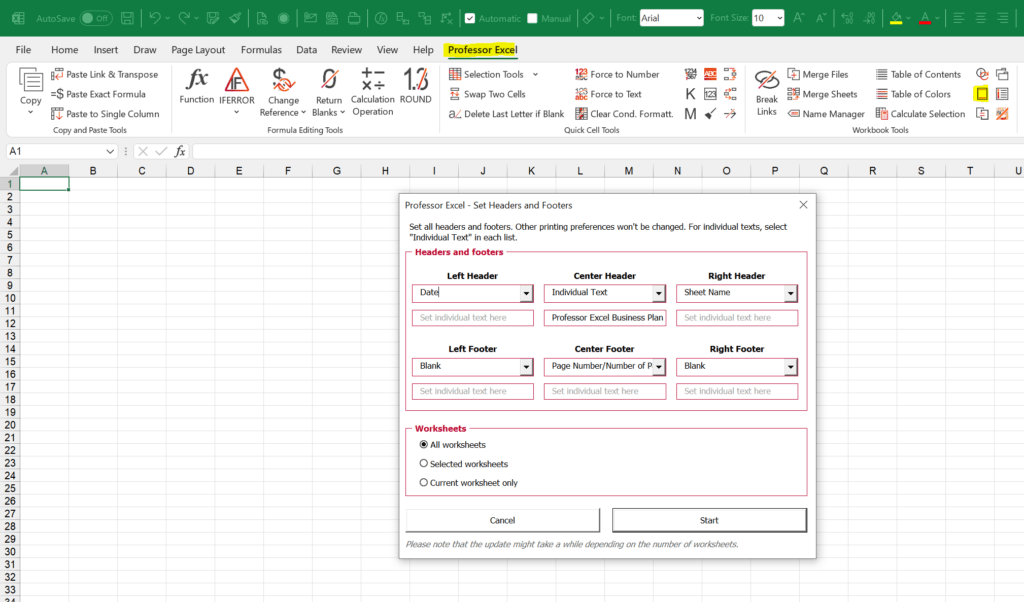
Also, the last settings are saved. So, each time you open the Professor Excel function, it pre-loads the last settings.
To conclude: With only two clicks you can set headers and footers for the complete workbook in your own style.


This function is included in our Excel Add-In ‘Professor Excel Tools’
(No sign-up, download starts directly)
More than 35,000 users can’t be wrong.
Image by Thanks for your Like • donations welcome from Pixabay