


Creating Excel workbooks is often a long process: Setting up the structure, importing inputs, conducting the calculations and eventually tidying it up and sharing it. So once you are done organizing the contents, you have to make sure that the contents are delivered and received well. Therefore it’s crucial that the workbook shows a certain level of professionalism. In this article, we’ll explore 7 simple tricks for making your Excel workbook look professional.
1. Hide gridlines

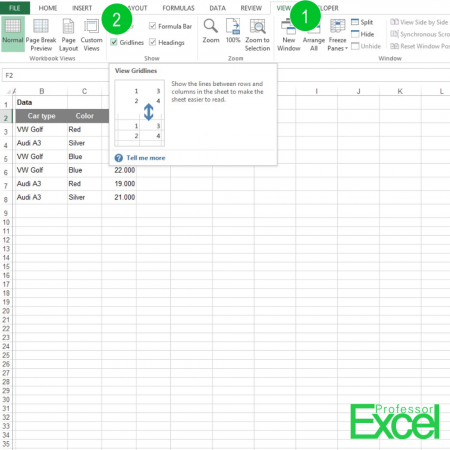
One of the easiest steps: Hide the gridlines. Of course gridlines provide some help for reading the tables. What about this suggestion: Hide the gridlines and manually define borders. Maybe you could try not to use the standard 1pt border but instead go with some dotted lines?
You can hide the gridlines on the View ribbon: Just untick ‘Gridlines’ within the Show group. If you need more assistance, please refer to this article.
2. Use of space
If the rows and columns are too narrow, your workbook easily looks crammed. Worst case, instead of values it shows ‘#####’ errors. Therefore, we got the following recommendations:
- Don’t always go with the minimum width and height of rows and columns. E.g. if you only got a few rows, why don’t you spread them further across the worksheet?
- Pay attention to the alignment of the content. Should the values and texts be aligned to the top, center or bottom of the cells?
- In some cases it can be useful to add (small) empty rows or columns. That way you can indicate that a new content block starts.
3. Fonts and Colors
There are some default fonts in Excel: For example, the later versions of Excel use the Calibri font. There are other fonts, which look more professional. Although boring – why don’t you try the Arial font family?
But even more important: Don’t use too many different fonts and font sizes. Stick with one font type and max. 2-3 different font sizes e.g. for highlighting headlines.

How many different colors do you use in your workbook? There is a general rule of thumb: The less, the better. Colors should help the user to understand your workbook and tables. Not to make him or her confused. So we suggest: Use max. 3-4 different colors, for example for symbolizing different cell types:
- Headlines
- Input or fixed values
- Calculations
- Comments
4. Number formats

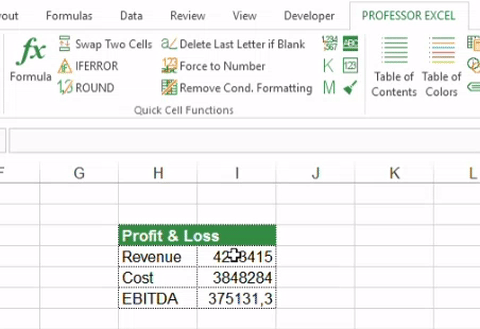
The format of the numbers in your workbook should support your data and analysis. Therefore please consider these points:
- Is it really important to show the 3rd decimal number?
- Can you help the user to understand the values by adding thousands separators?
- Would it be helpful if the number would be displayed in thousands or millions?
Also in this case the consistency is crucial. For the same data type you should use the same number format.
If necessary add some information about the values, for example the currency or indicating that values are percentage values.
Do you want to boost your productivity in Excel?
Get the Professor Excel ribbon!


Add more than 120 great features to Excel!
5. Professional workbook structure
If you do complex calculations in Excel, usually you got some kind of input data, some kind of calculations and eventually outputs and results. We recommend separating each type into different worksheets. So for each input, each calculation step and each output you could have separated sheets. If that way your workbook becomes very large, you could insert separator sheets. For example, add a sheet called ‘Inputs–>’ in front of all your input data worksheets.


6. Printable

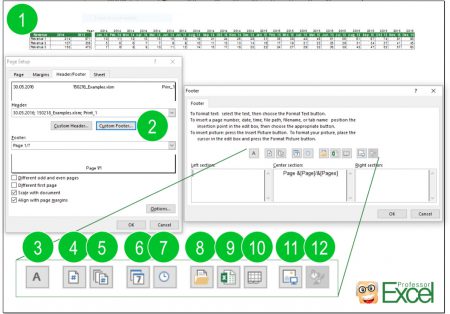
Many people are still printing out Excel workbooks. So unless you are sure that your workbook won’t be printed, better set a nice printing layout. That includes:
- Print ranges: What range of your worksheet should be printed out?
- Scale: What size should the printout be? This also defines the number of printout pages.
- Page orientation: If possible it’s nice if all pages got the same orientation.
- Margins
- Rows and columns to repeat: If your worksheets stretches over several print pages, make sure that the heading row is still visible on the last printout page.
- Headers and footers: They should contain some basic information on the data, file name, sheet name and page numbers.
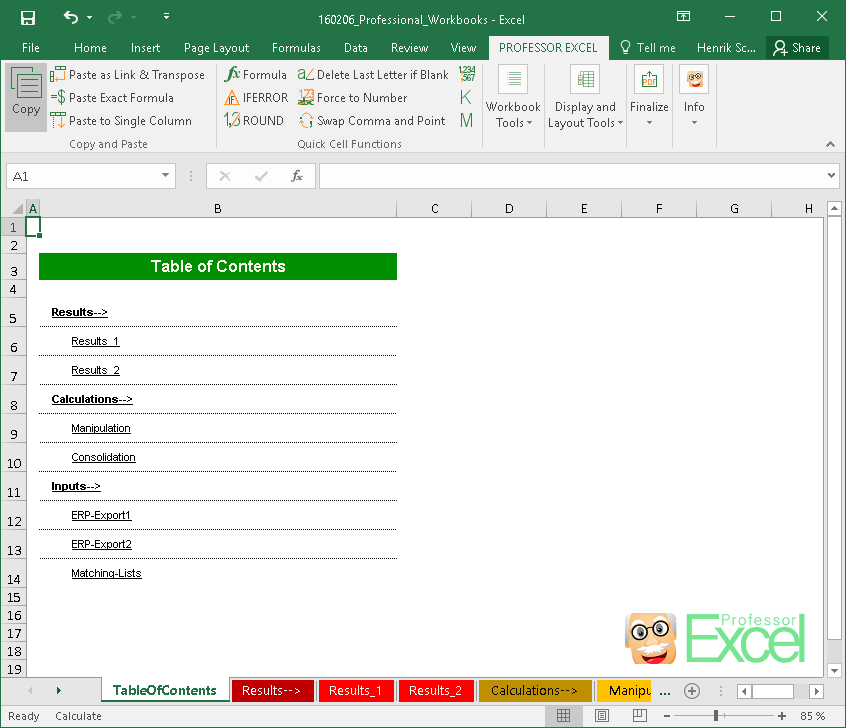
7. Table of contents


If your workbook contains more than – let’s say – 7 sheets you could consider adding a table of contents. You could add a table of contents as the first worksheet. On this table of contents worksheet you should have a list of all worksheets, possibly even with links to each worksheet. Furthermore you can add comments or instructions here.
In this article we describe 3 methods of how to insert tables of contents.


This function is included in our Excel Add-In ‘Professor Excel Tools’
(No sign-up, download starts directly)
More than 35,000 users can’t be wrong.
Summary:
When you read all these recommendations, please keep in mind: The most important guideline should be to help new users to understand your workbook as easy as possible. Usually don’t need any fancy design.
In many cases, these tricks can help with that but for all these points there are good reasons to disregard them.
To further simplify the process of applying professional layouts to workbooks, we’ve included many layout options – easy to find – in our Excel Add-In: Professor Excel Tools. Please try it for free!