 Which step do you spend the most time on, when you create an Excel model? Typing formulas and checking results, or rather setting the format, e.g. selecting borders, backgrounds, fonts, font sizes, font styles and even row and column heights and width? Formatting an Excel table can take a large amount of time, but “Format Painter” can greatly reduce the time you need.
Steps for using the format painter
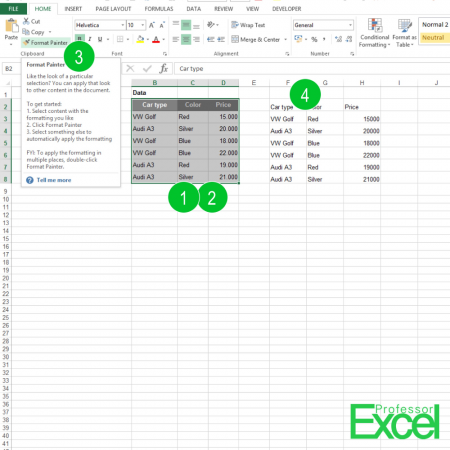
“Format Painter” copies the format of a cell or several cells and pastes the format with your next click. Here are the steps (the numbers are corresponding to the image above):
- Format a cell or a cell range as a template.
- Select the formatted range.
- Click on the format painter. Click it one time for just formatting one cell range, or double-click it if you want to apply the format to several ranges after one another.
- Click on the top left cell of the unformatted cell range.
Press Esc or the Format Painter again when you are done copying the format (in case you’ve double clicked on the Format Painter).
If you select a whole column or row, you can also copy their width or height.
One last recommendation: Put the Format Painter as a shortcut into the quick access toolbar. For example, if it’s in the fourth position in the quick access toolbar, you can easily access it by pressing “Alt + 4”. Furthermore, doing this the same way in PowerPoint, Word or even Outlook is very handy, as it is always the same keyboard shortcut for you.