Harvey Balls are circles filled to some level with color. Or, as Wikipedia says, “are round ideograms used for visual communication of qualitative information”. If you want to use them in Excel, you have two options: Make them dynamic with conditional formatting rules or fix them by inserting them as characters. Here is how to it both ways in four different methods.
Overview
In this article, you will learn three methods of how to insert Harvey balls into Excel cells. Please note the following comments:
- Method 1 and 2 insert characters (such as normal letters) into cells. This has the advantage that you can format them as normal letters (for example size and color).
- Method 3 uses Conditional Formatting rules and adapt to numeric values in cells. You cannot easily color them, but usually they look a tiny bit better by default.
- Method 4 is based on icons that can be arranged per drag-and-drop on top of your cells.
That being said, let’s get started!
Method 1: The fastest method with Professor Excel Tools

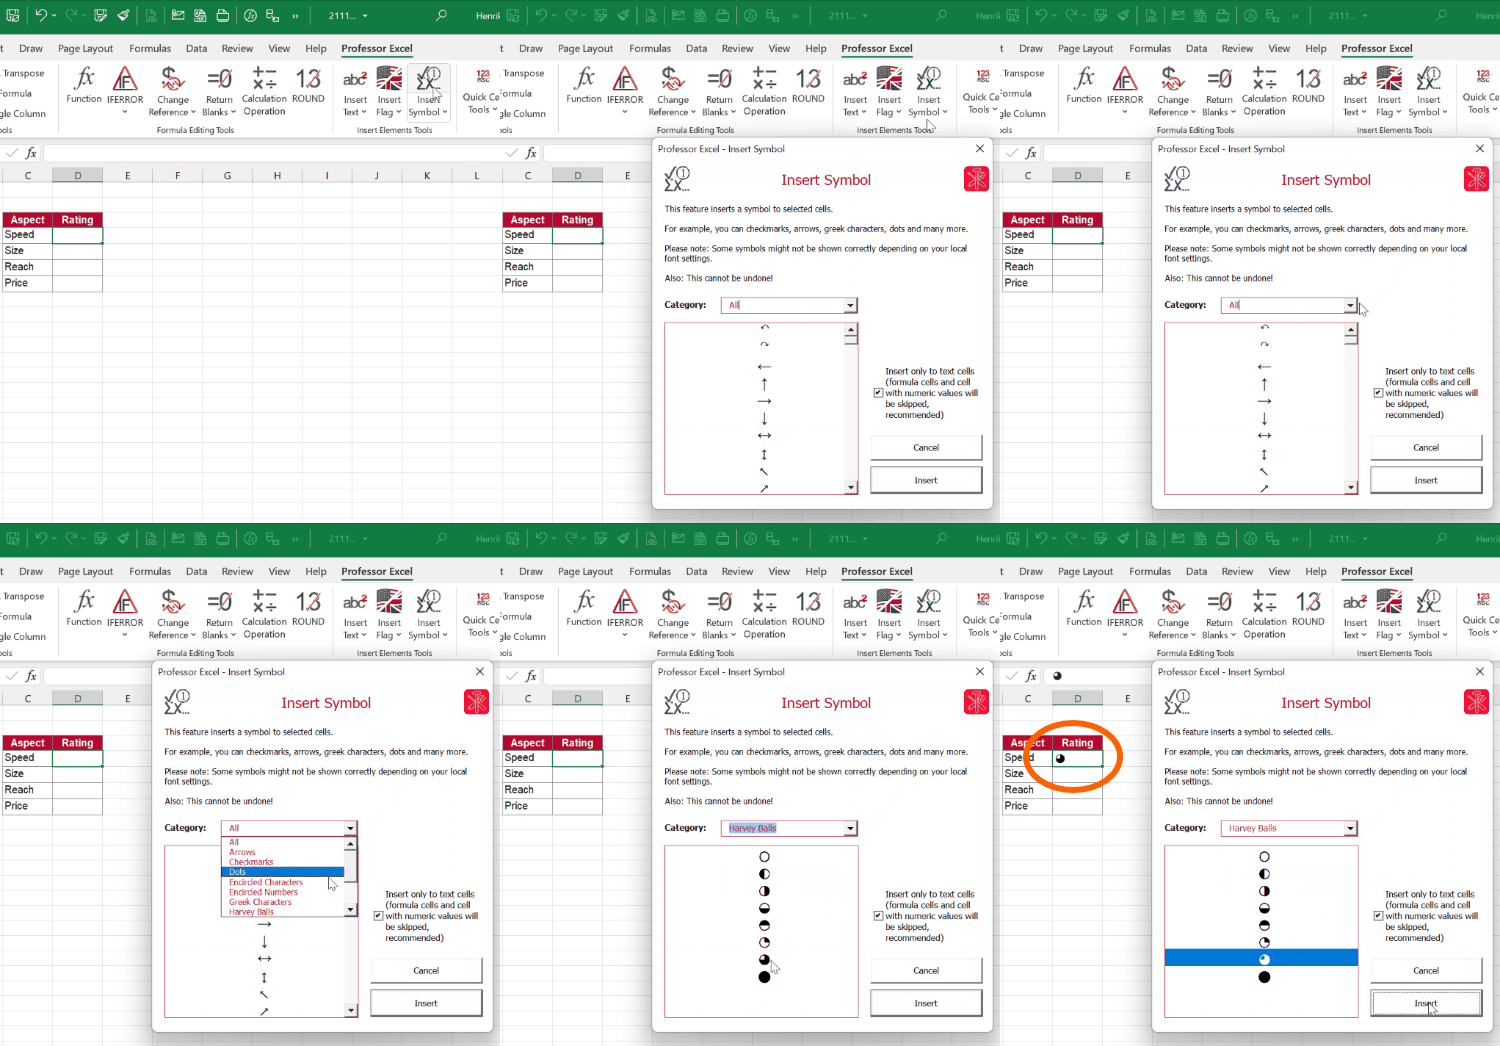
This is the fastest method: Go to the Professor Excel ribbon, click on the drop-down arrow of “Insert Symbol” and then on “More Symbols”. Alternatively, just click on the Insert Symbol button.
In the drop-down, select Harvey Balls. Then, click on the Harvey Ball you want to add to a cell and then on “Insert”.
Just download and install the Excel-add-in Professor Excel Tools and see if it works for you.

This function is included in our Excel Add-In ‘Professor Excel Tools’
(No sign-up, download starts directly)
More than 35,000 users can’t be wrong.
Insert Harvey Balls as Symbols
Method 2a: Use the =UNICHAR() function
Windows (and also macOS) have built-in special characters. Among them are Harvey balls. To access them, you can use the UNICHAR functions. Just type the following function into an Excel cell:
=UNICHAR(9681)
Replace the number with one of the following value for the respective ball.
| Harvey Ball | Unicode (hex) number |
|---|---|
| ഠ | 3360 |
| ◔ | 9684 |
| ◑ | 9681 |
| ◕ | 9685 |
| ⬤ | 11044 |
Method 2b: Just copy and paste
Probably not as beautiful, but it usually works: Alternatively, just copy and paste it from here.
ഠ ◔ ◑ ◕ ⬤
Method 3: Insert Harvey balls with Conditional Formatting rules
The two methods above insert “fixed” Harvey balls: The won’t change no matter what you type into an Excel cell. Do you want automatically adapt them based on a cell value? In such case, please use a conditional formatting rule.
Step 1: Insert Harvey balls with Conditional Formatting

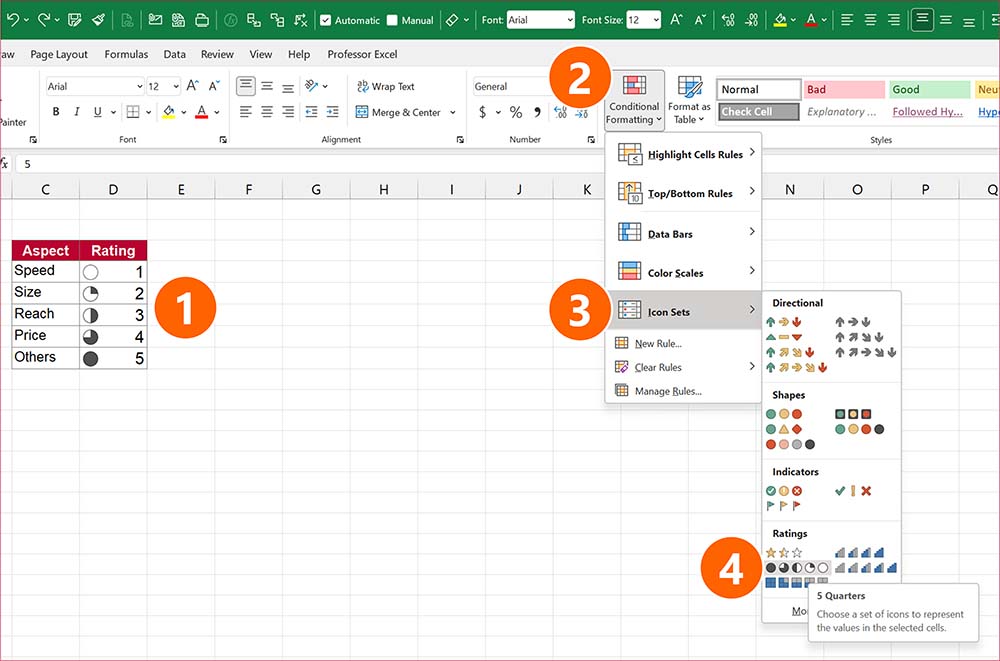
- Select the cells you want to insert the icons to. These should be cells with numerical values.
- Click on Conditional Formatting in the middle of the Home ribbon.
- Go with the mouse to “Icon Sets”.
- Click on Harvey Balls.
Step 2: Don’t show the numeric values
Now, you can already see the “first draft” of the circles. Next, we will finetune them.

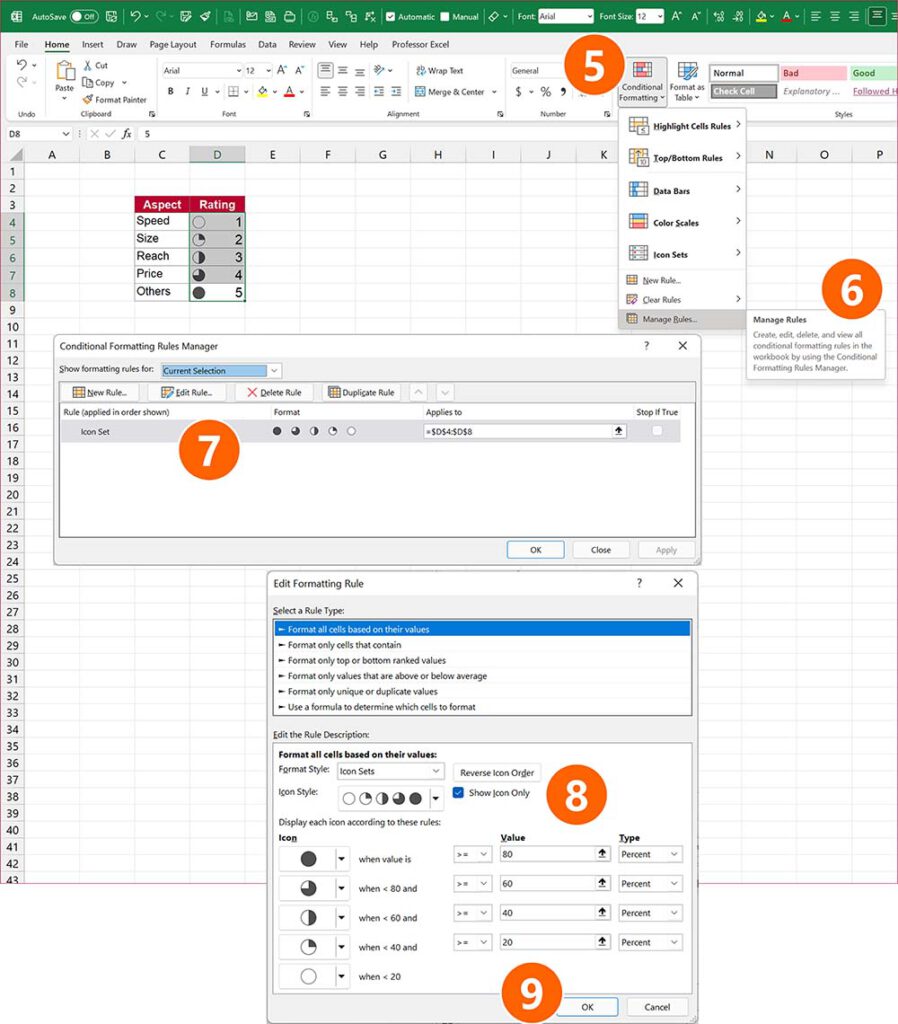
- Go to the Conditional Formatting button on the Home ribbon again.
- Click on “Manage Rules”.
- Double click on the Harvey ball rule in order to open and edit it.
- Usually, you don’t want to show the numbers next to the icons. In order to achieve that set the check mark at “Show Icon Only”.
- Click on OK.
Step 3: Fixate the scale so that it does not change with the minimum and maximum value

That’s it, it look quite good already (see the screenshot on the right-hand side).
Unfortunately, they have one disadvantage: If you remove one of the “extreme” values (empty or completely filled balls), all other change. The now highest value will then be the filled Harvey ball and the now lowest value the empty one.
Let’s try to fix this. The goal: When you type 1 into a cell, the empty Harvey ball should be shown. 2 should be filled to one quarter, 3 half and number 5 the completely filled Harvey ball.
Open the Edit Formatting Rule window again (see steps 5 to 8 above). Now, set the Values and Types as shown below.

Method 4: Add Harvey balls as icons (similar to shapes or images)
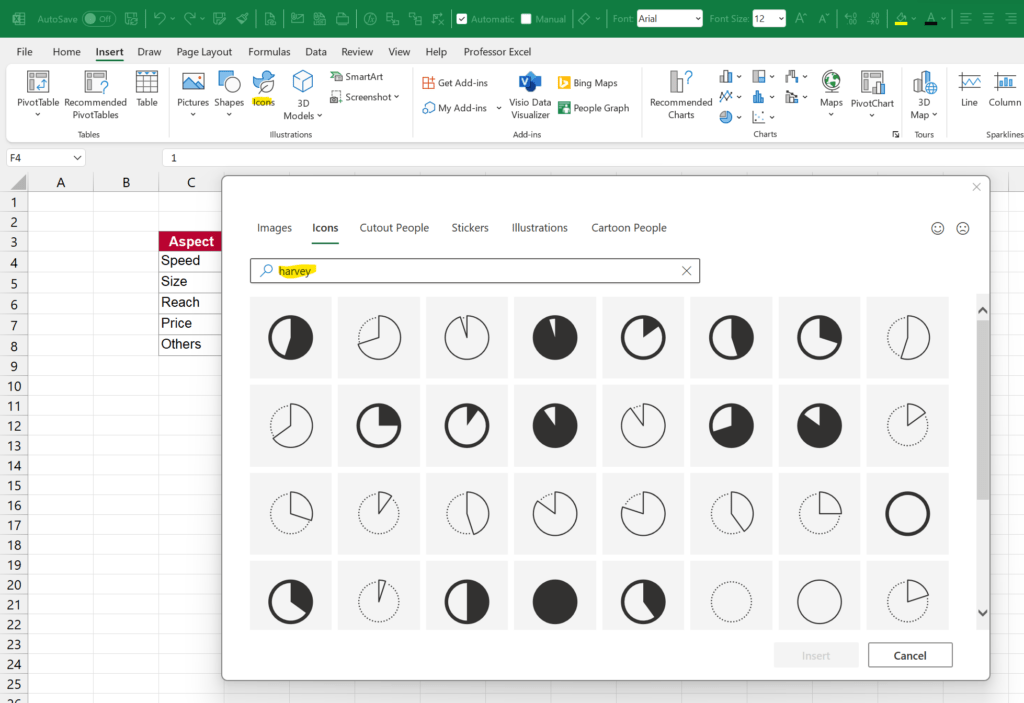
The forth option is using the icon function in Excel. Go to the Insert ribbon and click on Icons. Then, search for “harvey”. Microsoft offers 2 different layouts of them. Besides the standard balls (such as empty, 1/4 filled, half filled, 3/4 filled and full), you can select from some more steps in-between.

Select the balls you need and click on “Insert”. Now, you can arrange them per drag-and-drop. You can furthermore change the color.


Very nicely explained – thank you!