
You have finished working on your Excel file and it basically looks fine. Most of the texts and numbers are in Calibri Font. But what, if you want (or need to…) change it? In the whole workbook? Here are some tips and tricks of how to change the fonts in the entire Excel file.
Method 1: Select all worksheets and set the font
This is one of the fastest method: Change the style in all cells – no matter if they have values or not – simultaneously.
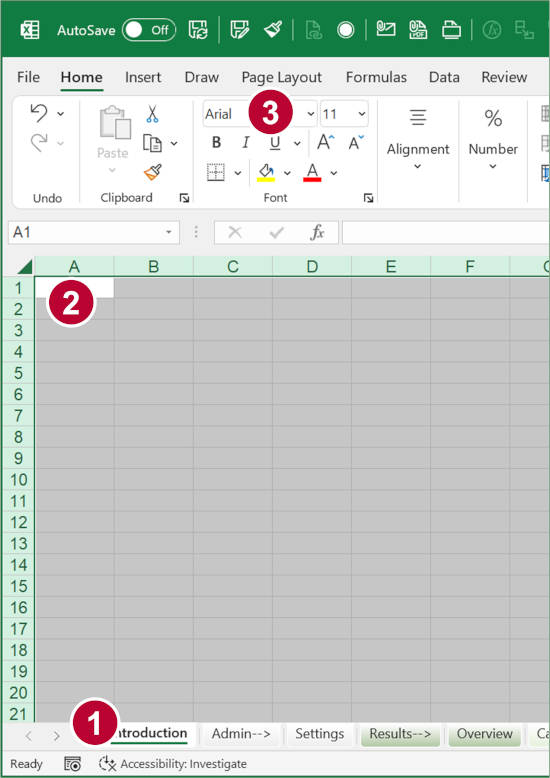
- Select all worksheets by clicking on the leftmost tab, holding down the Shift key and clicking on the rightmost tab.
- On any of the worksheets, select all cells:
- Either press Ctrl + A on the keyboard (maybe you have to do it twice if not all is selected),
- or click on the small arrow on the top-left corner of all cells.
- Change the font. Excel applies the changes now to all sheets.
One word of caution: This method might increase the file size because it formats all cells on all worksheets. I have listed this method because it’s very fast any easy, but please consider using one of the following methods instead.
Method 2: Change the font within the Excel theme settings
This might be worth a try: Change the font style in the Office / Excel theme settings.
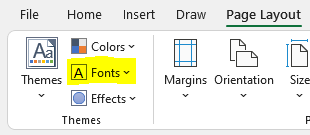
- Go to the Page Layout ribbon.
- Click on “Fonts” in the Themes section (on the left).
- Select your desired Font.
Please note: This only works if you have not manually changed Fonts before.
Method 3: Use the cell styles
First: This only works if your Excel file is consequently formatted using the built-in cell styles. From my own experience: Usually, it’s not…
Anyway, here is how it works:
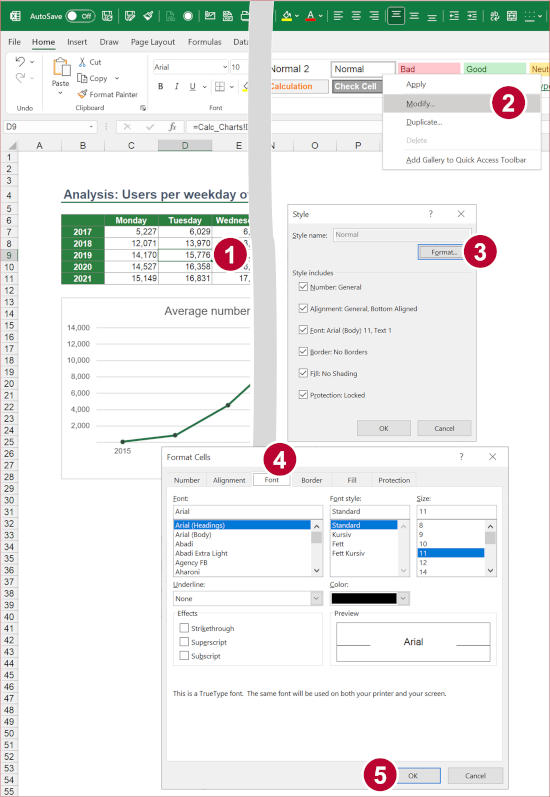
- Select a cell with content. Here: A cell with the style “Normal” is selected.
- Right-click on the style on the Home ribbon. Then, click on “Modify”.
- In the style window, click on the “Change” button.
- Go to the Font tab and select a new style.
- Click on OK.
If necessary, you have to repeat it with other cell styles (for example headings).
Method 4: VBA Macro to change the font style
Our next method involves a short VBA macro. Copy and paste the following code into a new VBA module and click on Start. Click here to learn the steps to insert a new module and paste code in a short, dedicated article.
Here is the code:
Sub changeFontEntireWorkbook()
    For Each Worksheet In Worksheets
        Worksheet.Activate
        ActiveSheet.UsedRange.Select
        Selection.Font.Name = "Arial"
    Next
End Sub
Replace “Arial” with your desired style name (make sure, you spell it correctly…).
Method 5: Professor Excel Tools
To keep it as simple and convenient as possible, we have included a Font feature in our Excel add-in “Professor Excel Tools“. The add-in extends Excel with powerful functions without cluttering your Excel.
Here is, how it works:
- Click on “Font” on the Professor Excel ribbon.
- Select the style and the scope (in this case, the entire workbook).


This function is included in our Excel Add-In ‘Professor Excel Tools’
(No sign-up, download starts directly)
More than 35,000 users can’t be wrong.
Additional tip: Change the default font before you start working in Excel
Besides changing a style after your file is set up, you can also set a default font. That way, all new files use this standard text type. It’s quite simple:
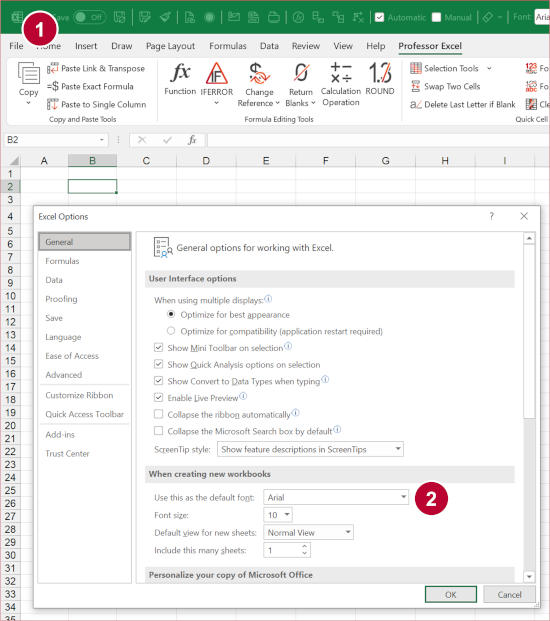
- In Excel, go to “File” and click on “Options” (in the left bottom corner of the screen).
- On the General tab, set your default style at “Use this as the default font”.
This was super helpful, thank you! 🙂
This was helpful. THANKS!